Come learn with me!

Author: larasmith (Page 4 of 7)

Week Twelve

This week, we participated in an edcamp! This was exciting since I had never been to an education event with this many people before. While I was there, I got to attend different sessions that will help me in my future as an educator. The three sessions I got to listen to were getting ready for the first practicum, Indigenizing the classroom, and mental health in the classroom.

During the practicum talk, I learned a lot from different educators on what they believe we should do on a practicum. Some of this advice was obvious, such as have fun or plan ahead. But I also learned some things I would have never thought about. For example, one of the suggestions was to keep a day book. This will help me in the end since I will be able to remember what happened within the class and how I handled it. I can also reflect in the book and talk about what I wish happened. This idea will come in handy if I ever have a job interview or need to reflect when I get my own classroom in the future. I also learned a bit about authority within a classroom. The only time I have been in the classroom in the past is on my Wednesday visits last semester. Other than that, my only experiences with children have been in summer camps. This differs from the role of the teacher since although you are still an authority figure in summer camps, your job is to allow the children to have fun and stay safe. When you are the teacher, you need to ensure the students still have fun and keep safe, but also that they are learning and getting a good education. There also has to be boundaries set with the students to ensure there is classroom management and that the day runs smoothly.

In the Indigenizing education section, one of the people in the breakout room discussed how we can include the First People’s prinicples into our classrooms. What I found most interesting, is that they told the students the principle and had them connect it to what they were learning. I assumed that since it was a guideline in the class, we would not tell students which principle we were covering and that it would just be for our knowledge as teachers. However, they said that we should tell the children the principle and allow them to make meaning from it. The people in the breakout room also agreed that teachers should explain the principles to their students since they cannot talk about what they do not understand.

Finally, the last session I joined was the mental health group. Here I learned a little more about project-based learning (PBL). I did not spend much time in this group, but, I learned that inquiry can be good for a student’s mental health since they are able to learn about what they want in a method that works for them. When students are more independent, they will get a rush of dopamine since they feel accomplished with the work they completed by themselves.

Edcamp was great and I would love to join in for another section someday. It is interesting since I thought it would be a lot more formal than it was. I would love to attend a session in person, that way, I would get to meet a lot of new people and experience how edcamps work in-person.

Week Eleven

When I was in elementary school, I never used coding so this is completely new to me. In high school, I remember a couple of my friends got pulled out of class to do a coding workshop where they played a game using Barbie; I always thought that was cool.

I think coding is a great thing to teach in schools. As the world becomes more technological, the more code is being used. If coding is being taught in elementary school, there are more chances that students will be interested in learning more about code and considering it as a future profession. Especially, if coding is taught to girls, we might have more women in STEM.

While exploring code during class time, I joined the Scratch JR. group. I was able to download the app on my iPad and create a little scene with different characters. It was very confusing at first. I did not understand what was going on and just kept on making random patterns for the character to follow. However, as I started exploring the app, I found examples that were much more sophisticated than mine. I looked at how they coded the journey of the character and figured out what some of the buttons meant.

The Cat’s Journey.
The Moon’s Journey.
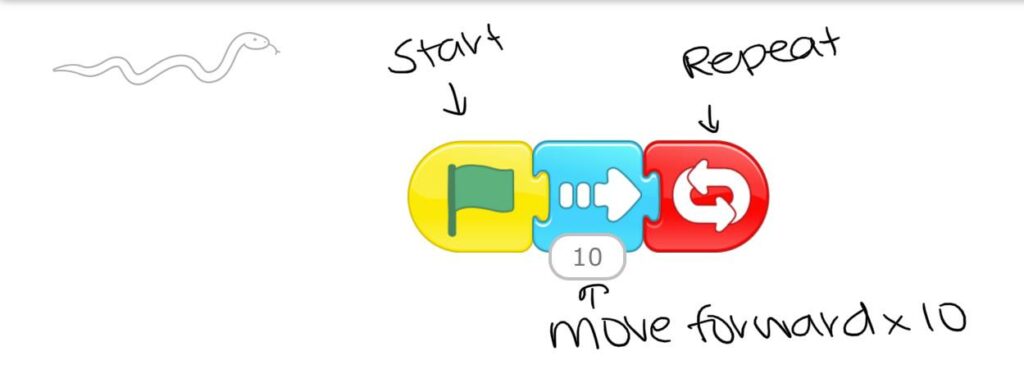
The Snake’s Journey.
The final movie.

Week Ten

With the emergence of online education arising because of the pandemic, distributed learning is more important than ever. Although all of my classes this semester are synchronous (all the participants are completing the activities at the same time) a lot of my friends are completing their lectures asynchronously (participants participate at different times in different locations). I have done both styles of learning, so I know there are pros and cons to each type; such as in asynchronous classes, the students can plan their class schedule around their work schedule instead of the opposite.

It is interesting to see how many different ways there are to meet now. It is almost impossible to avoid someone since there are so many different ways people can communicate. An example that comes to mind for me is that next year when classes are in-person, it will be harder to have snow days where school is cancelled since everyone will be able to log onto a zoom call and access the lecture from their homes.

Although I have mostly used zoom and MS Teams to schedule meetings this year, it is interesting to see all the options that are out there. Such as the Gathered Town, where you can get together with 20 friends and walk into someone to start a face-to-face conversation with them, just like in ‘real-life’.

Organizing events into whether they are more synchronous or asynchronous and whether they are teacher or student controlled.

Finally, we talked a bit about Pedagogy vs. Modality. Many people say that online classes are less engaging since they are online, however, that is untrue. It depends entirely on the pedagogy the teacher uses. For example, last year I fell asleep during a history class which was in-person; however, I was completely engaged within a different history class last semester. Depending on how the teacher teaches influences whether the class will be engaging.

Week Nine

Inclusion and exclusion is something I am worried about as a future teacher. Of course I want all of the students in my class to feel like they belong, but I do not know how to incorporate that sense of belonging. This is why Tracy Humphrey’s talk was so useful to me. It was nice to have her come in and speak to the class since she had first-hand experience as a mother in a situation where her son’s needs were not being met. It was also interesting since she is the founder of BCEDACCESS, which will be a helpful resource for when I am a teacher.

What was really beneficial was the process behind helping students and their parents advocate for themselves within a school district. As Tracy mentioned, the start of a complaint with the school is with the teacher, so it is important for us to follow the right steps and go the extra mile to have inclusive classrooms.

Some ways I can help parents and students with their advocacy:

  • Writing down examples. By putting information down in writing, there is proof that a student’s needs are not being met. This will help them advocate since you can bring in real-life examples of when a situation occured.
  • Follow-up. If a parent has concerns, don’t wait for the school to follow-up with the parent to ensure everything is going well. Have a conversation with the parents to make sure their child has everything they need and that their needs are being met.
  • Collaborate with families. If the teacher has a relationship with a family, it becomes easier to talk to parents about what their children need and makes the teacher more approachable. Sometimes, the parents might not even know anything is wrong. This would be a much easier conversation to have if there was a relationship formed.

What really surprised me during this lecture was the statistic that 133 million girls are not attending school right now, this includes disabled girls in BC. When I think of girls not being able to attend school, I think of third-world countries where families may need the extra support from their daughters at home. I never thought that this would include girls within my own province. By creating a conversation on inclusive education, we are potentially opening the door for many more girls to go to school in the future, with classrooms ready to support them.

Week Eight

This week we talked about using videos in education. I am no stranger to teachers using videos to help me learn and me finding videos to help teach me. Throughout high school, I would sit through at least one video a day from teachers that thought it would help me learn better (which it did). Videos are especially useful in class to show us processes or experiences we wouldn’t normally see. For example, in my Biology 12 class, the teacher used videos to help us see what DNA and RNA looked like. Without these videos, I wouldn’t be able to see how these two structures function.

On the other hand, I have also used videos to help me learn independantly. In my psychology class last year, I would often watch the CrashCourse video on the lesson we had just learned so I could go over the terms in simpler language. This helped me retain the information since Hank Green added animations and jokes that helped the memory stick in my brain.

We also talked about GIFs in this lecture. GIFs are some of my favourite things to add to projects since they are so much more expressive than a picture. They are also useful when I talk to my friends. I can send them a GIF of my exact reaction to their text message, that is more expressive than an emoji.

I have made a lot of videos throughout my life and have recently started getting into iMovie editing. For this class, I have made a video of me using different French words:

Also for this class, I made a timelapse video of me creating a friendship pin. This was done with the timelapse effect on my iPhone.

Week Seven

This week, Jeff Hopkins came and talked to our class about his school for inquiry learning (Pacific School of Innovation and Inquiry (PSII)). Inquiry is something that I want to explore when I become a teacher, so I am grateful for the experience of hearing Jeff talk.

What I found especially interesting, was the tour of Jeff’s school:

I found this video interesting for a multitude of reasons. Firstly, it was filmed using a special camera that allows the viewers to get a 360 view of the space. This was really interesting since I rarely see videos filmed this way. It really elavated the tour and gave me a sense of the space they have, which I normally wouldn’t get unless I was in-person.

I also found the spaces really interesting. The lab in paritcular, was designed like a unicersity lab where the students can follow along with the instructor. I found this interesting since I was able to relate this to the GRR model of learning. Although the experience is guided, the student still has a lot of independance within the activities. As Trevor Mackenzie said a couple weeks ago, students cannot just be thrown into inquiry. Instead they need to be taught and guided so they know how the process works.

I also noticed within the tour, there were lots of spots for students to collaborate with each other. Although it was limited, due to COVID, they still had spaces where students could go and work together on an assignment or go on a zoom call together. Part of learning is learning with and from other people you are with, I love how much collaboration this school has so people can inquire and rely on each other.

Although I wish we got an in-person tour, I am glad that I still got to see this 360 tour of the school. Once COVID is over, I would love to go into the school and experience it in person if I am able to. I love the dynamic and how they are learning through inquiry, which is something other schools are just starting to incorporate.

As for the screencast video, in the past, I created a video for my PE class where I had to present my lesson plan, so I am fairly familiar with the process of recording. I typically record mine over zoom, but would love to try it your way as well.

Week Five

This week, Trevor Mackenzie came into our class and talked about Inquiry. This was interesting to me since towards the end of high school, I started to get tasked with more and more inquiry projects. I love inquiry since it focuses on the students’ interests and builds their intrinsic motivation to learn. I appreciated Trevor’s lecture since he explained all the different types of inquiry, as well as allowing us to reflect on what we already know/would like to know in the future. I also appreciated how Trevor said we could use Bitmojis of all the students to gauge where they are at with the material since I love my Bitmoji (Pictured below).

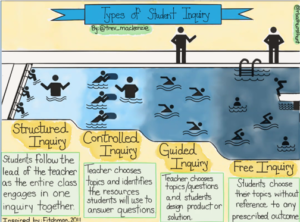
I also love Trevor’s pool graphic and have been thinking about how he said don’t push students in the deep end since he has come to talk. Whenever I thought of inquiry, I assumed that it was student-led and relied very little on the teacher. However, through Trevor’s talk, I learned that inquiry can still exist if it is guided by the teacher. In the past, I only knew about Free Inquiry. However, I have now learned that there are three other types: structured inquiry, controlled inquiry, and guided inquiry. I will be sure to include these in my future classroom since I know what it is like to drown in the deep end.

have a good week

Reflection

Through these art projects, I have learned so much about art and had fun while doing it. I have learned a lot about using techniques in art (especially shading). I also learned a lot about different websites to find resources for in the classroom.

I have learned a lot of different techniques from going through these projects. Although I agree, the picture was usually better than mine, I really surprised myself with how many of these activities I was able to do. I am not typically an artistic person and don’t do well in art classes. However, when I was completing these projects, I was doing it for fun and not necessarily because I had to be the best in the class. This gave me time to work on my technique, as well as have fun doing art as I used to in elementary school. I think that since I have practiced all of these projects, I will be a better art teacher because of it. I already have an art lesson for almost every grade.

I also learned how to collect resources from different websites. Throughout this project, I needed to find different art projects to complete for each grade level. This task was exciting since I got to explore different platforms and learn about what are the benefits of choosing some platforms over others. For example, I found an art teacher on TikTok that posts what kind of lessons her kids are doing that day. I used to think of TikTok as only a recreational app, but I will be sure to consider it in the future for other assignments.

Out of all the places I found resources on (TikTok, Instagram, YouTube, Websites), I liked TikTok and YouTube the best. TikTok, since they are short one-minute videos giving me the basics of the activity. They still get the point across and they do not lose my focus. I liked YouTube since there was more time to explain the activity and I could see what the person was doing. On Instagram, there would typically only be pictures of the final project or a picture halfway through the activity. This left me guessing as to what techniques and materials they actually used to complete the work. Websites are in the middle of TikTok/YouTube and Instagram. I was able to get all of the information from their blogs, but I would have liked a video so I could see what was happening.

Extra Art

 It is finally spring and what is a better way to celebrate than by making tulips out of watercolour. Every year the tulips grow outside of my house, so I knew I had to make this project!

For this activity, I used these materials:

  • Watercolour paper
  • Watercolours
  • Scissors
  • Paintbrush
  • Printer paper
  • Glue
  • Acrylic or tempera paint

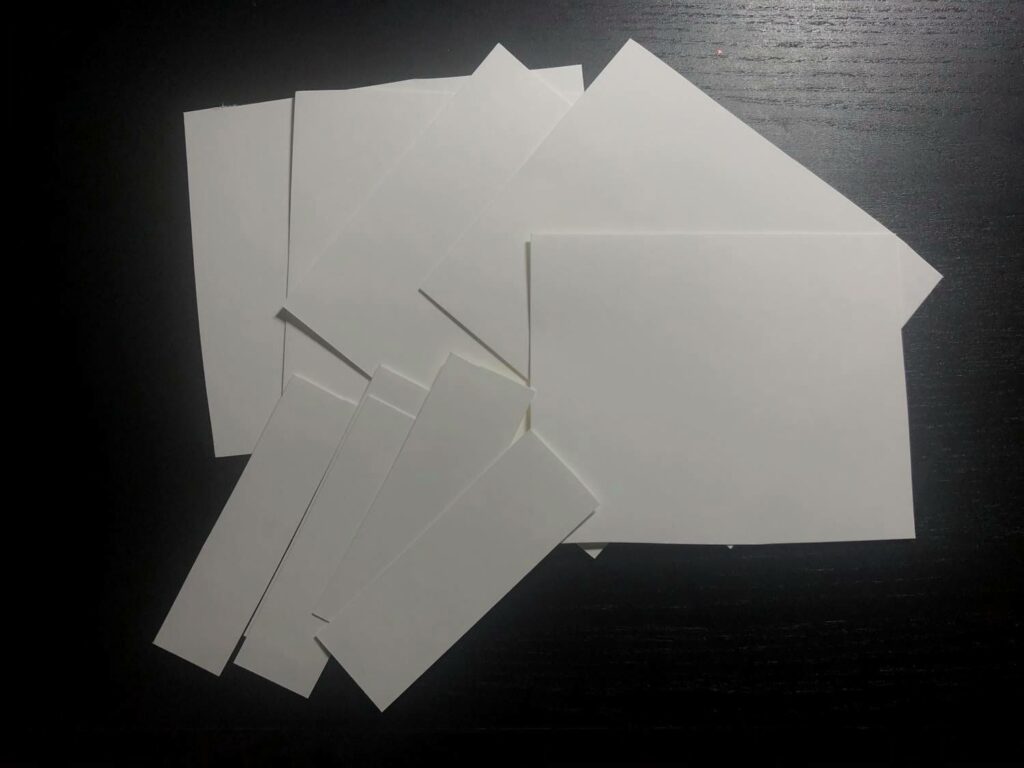
If I were to use this activity in a classroom, I would be sure I spread out the art through two days are at least have a break in between for the paint to dry. Since I was making this art by myself, I did not have to paint entire sheets of paper in one colour. Instead, I divided up a sheet into 5 flower heads and 5 stems. This will be the perfect amount for one work of art.

My cut sheets of paper.

Since this art project was posted on Instagram, I only had photos to guide me through the process. This was a little more challenging than the other projects I have done since I had to guess the steps in this craft.

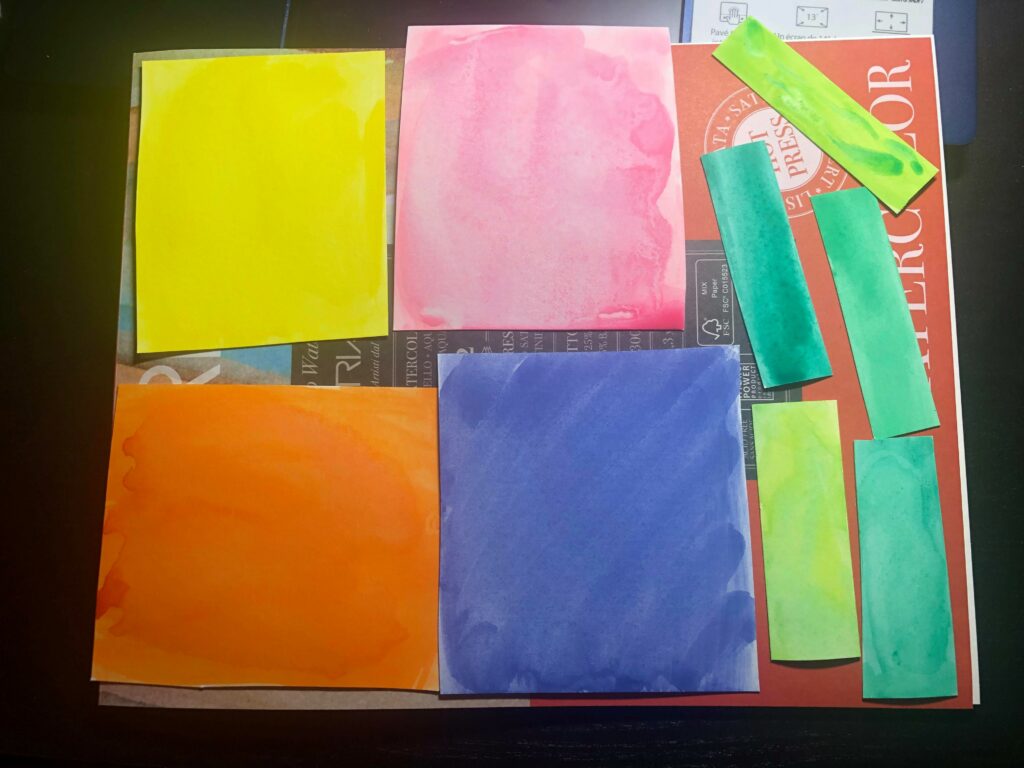
After I cut all of the papers, I coloured them individually. I decided to delve more into colour; so three flowers are going to be in warm colours (red, orange, yellow) and two flowers are going to be in cool colours (green, blue, purple). I also used darker shades of the colour within the original colour to add some texture or charecter to the painting. I am hoping that this will make my final results cooler!

Here are the colours I have chosen. Purple was placed somewhere else to dry.

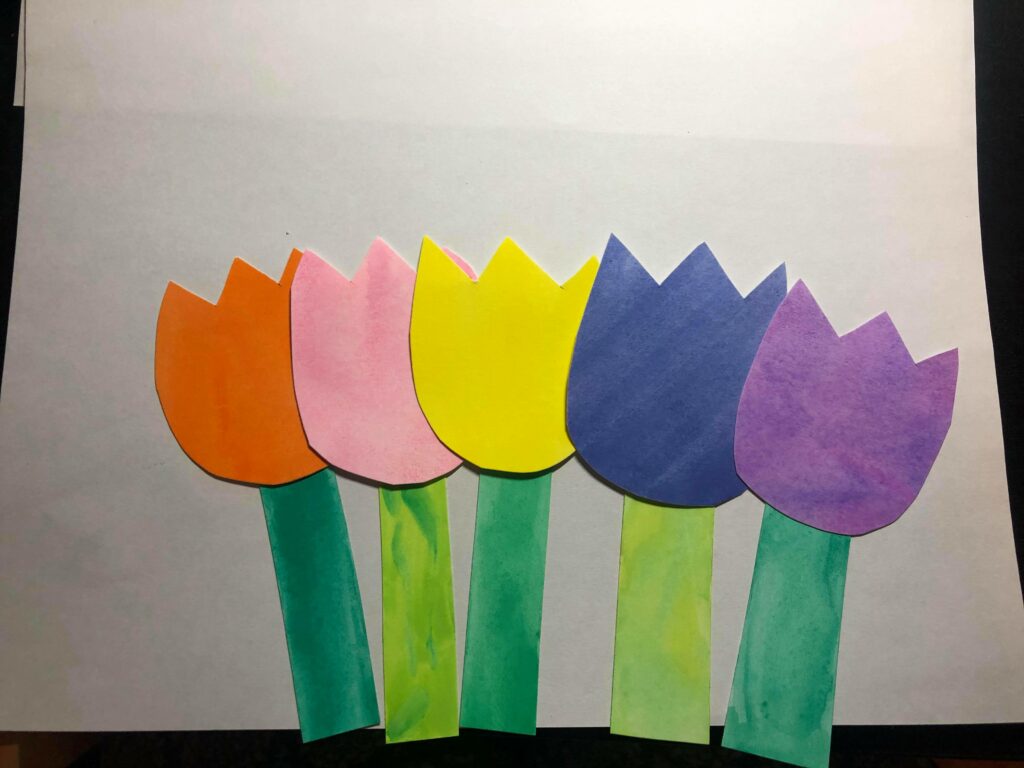
I then cut out the tulip shapes and glued them down on the paper. I draw the outline on the back of the paper so that I wouldnt have black marks on my flowers if I cut them differently.

After I glued down my flowers.

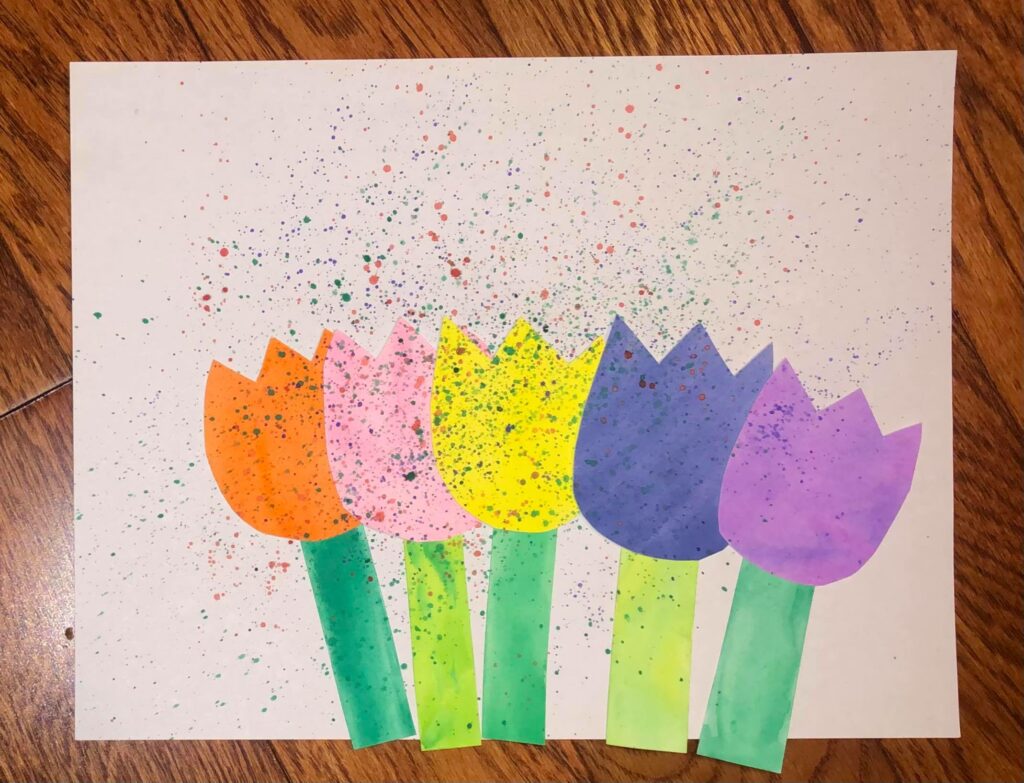
After I glued down my flowers, I decided to take out the watercolour paints and splatter the paint. I only used three colours, I thought anymore would make the painting too crowded. To flick the paint, I took a paintbrush with watercolour on it and used my thumb to pull back the bristles. If your thumb moves towards you, you won’t get hit by paint!

Splattering the paint.
The finished project!

Pros:

  • Nice spring activity. The colours are bright and it makes me happy that Spring is finally here.
  • I liked painting the colours on the paper first and then using them to cut out the Tulips. I think this was a much better alternative than construction paper since everyone can decorate their own sheet however they want and then we can share as a class. It also gives students the opportunity to experience mixing colours.
  • Involves organic and geometric shapes. The stems are all rectangles and the Tulips are an organic shape. This could be an introductory lesson to a shape unit.

Cons:

  • Splattering the paint is really messy. The drops are all really small so it is hard to see what you got it on. The teacher would need to prepare before doing this in their class.
  • Glueing watercolour paper onto printer paper doesn’t work. The watercolour paper had bent a bit from getting wet and the edges didn’t stick down to the printer paper sheet.
  • The activity would take a couple of days since the painting of the paper would take a while to dry and then splattering the paint would take a while to dry.

I would use this activity in a class! It is a really nice way to bring Spring into the classroom; I can only imagine how pretty these would look covering a classroom’s walls. There are many different curricular competencies that could be applied here, such as connections to shape and colour.

Grade Seven

This activity reminds me of when I was in elementary school and my teacher had just shown us how to make a 3-D hand drawing. Many of the lines in that art piece looked the same as this one. I chose this art piece since the shading and the pattern just look super cool.

Materials:

  • Paper
  • Crayons
  • Sharpie

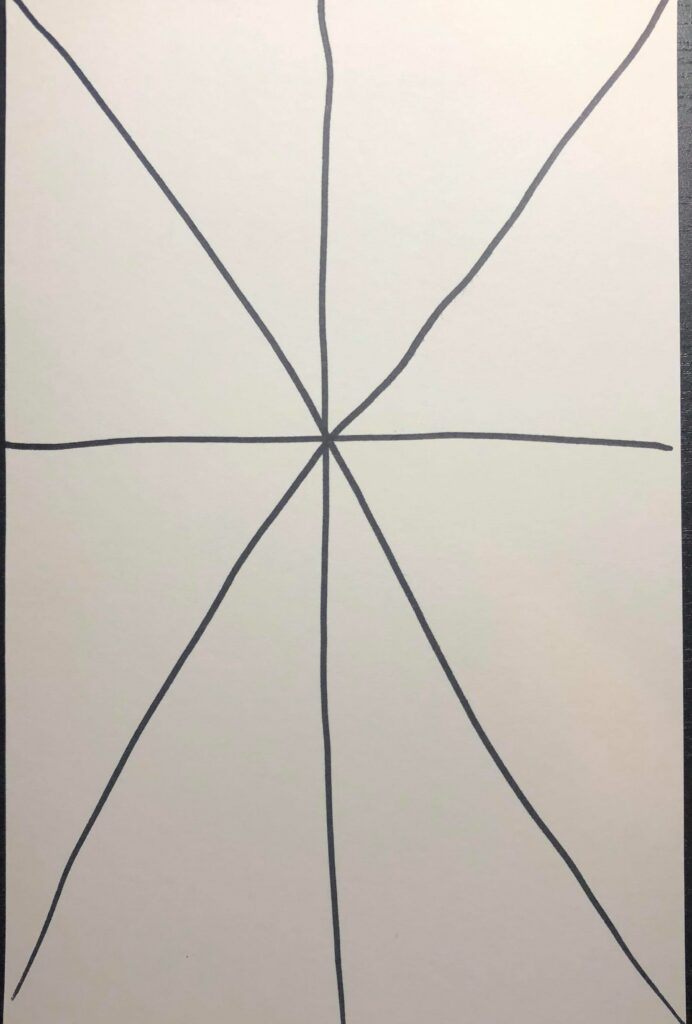
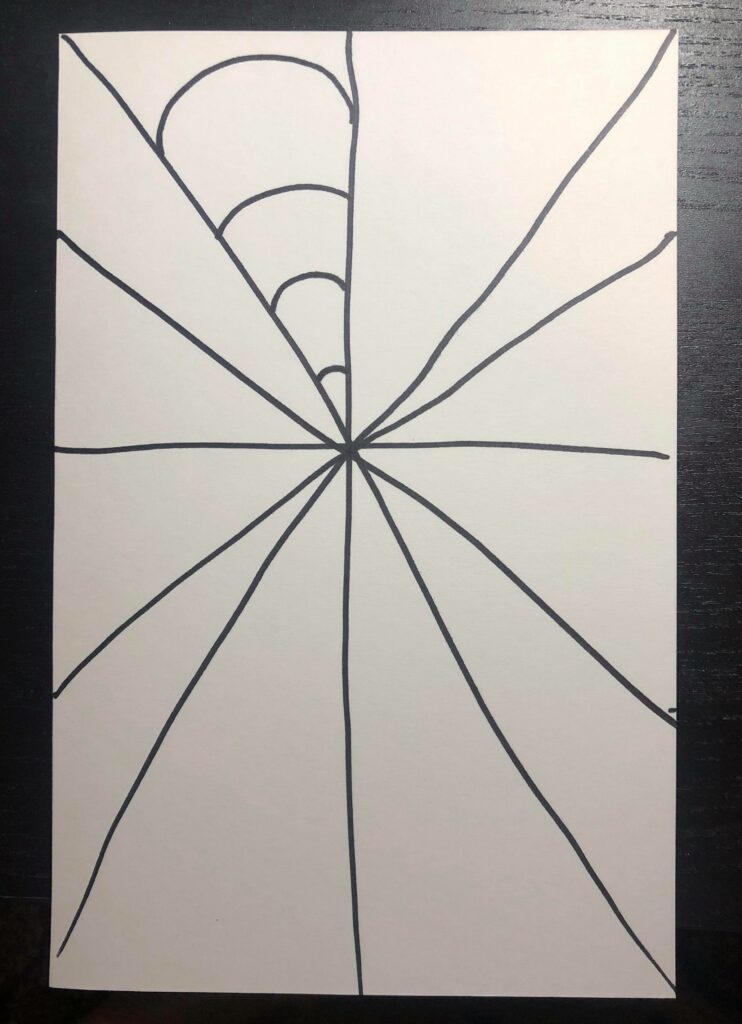
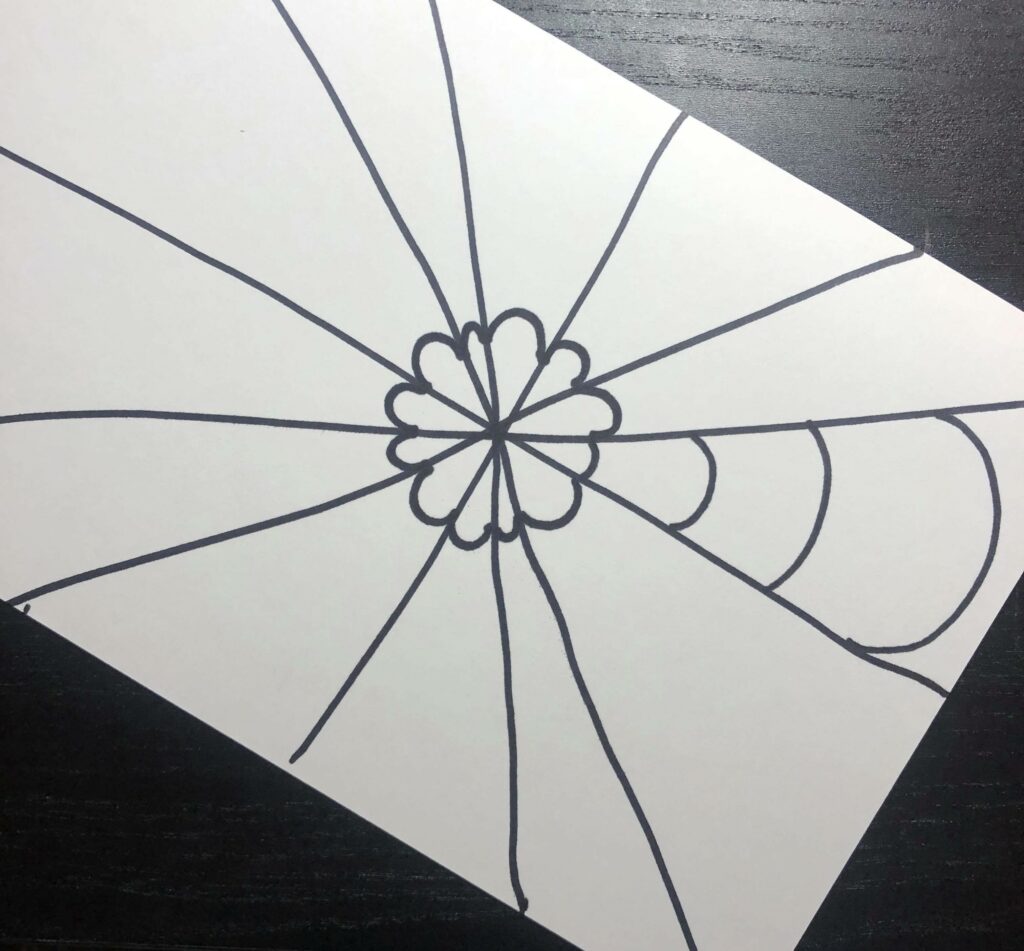
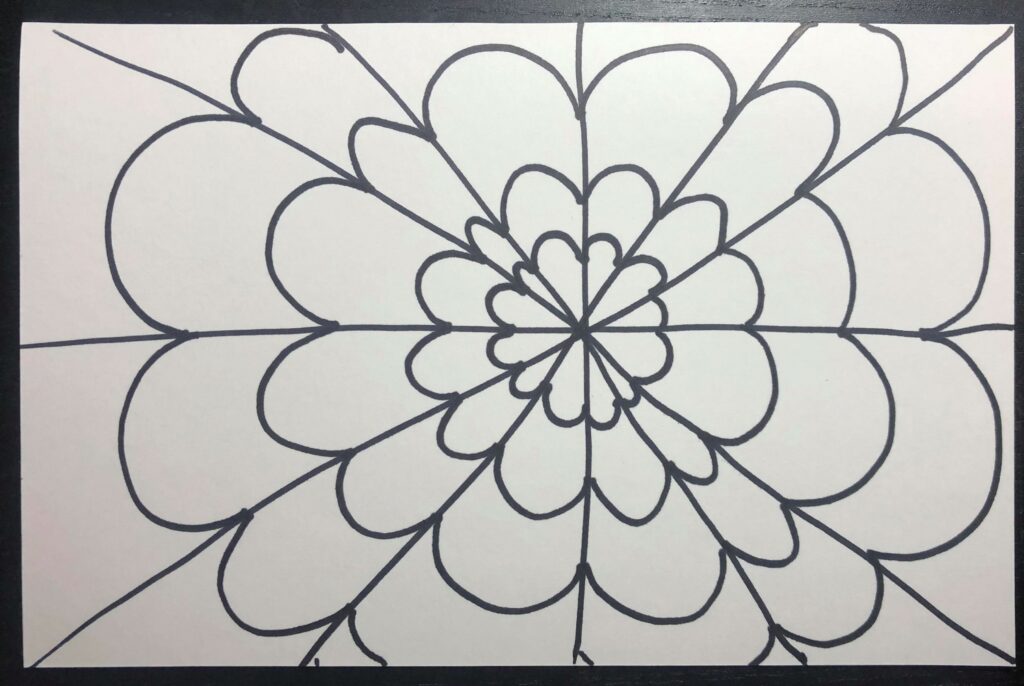
To start this activity, I divided the sheet of paper into six sections. I then went around in a circle creating an upside-down ‘U’ shape in each of the sections. In the video, it was pointed out that the more circular the lines are, the more 3-D the end result will look. Each ‘U’ has to connect at both ends, but it is not a spiral, to ensure this happened I went around each segment before moving onto the next (pictured below).

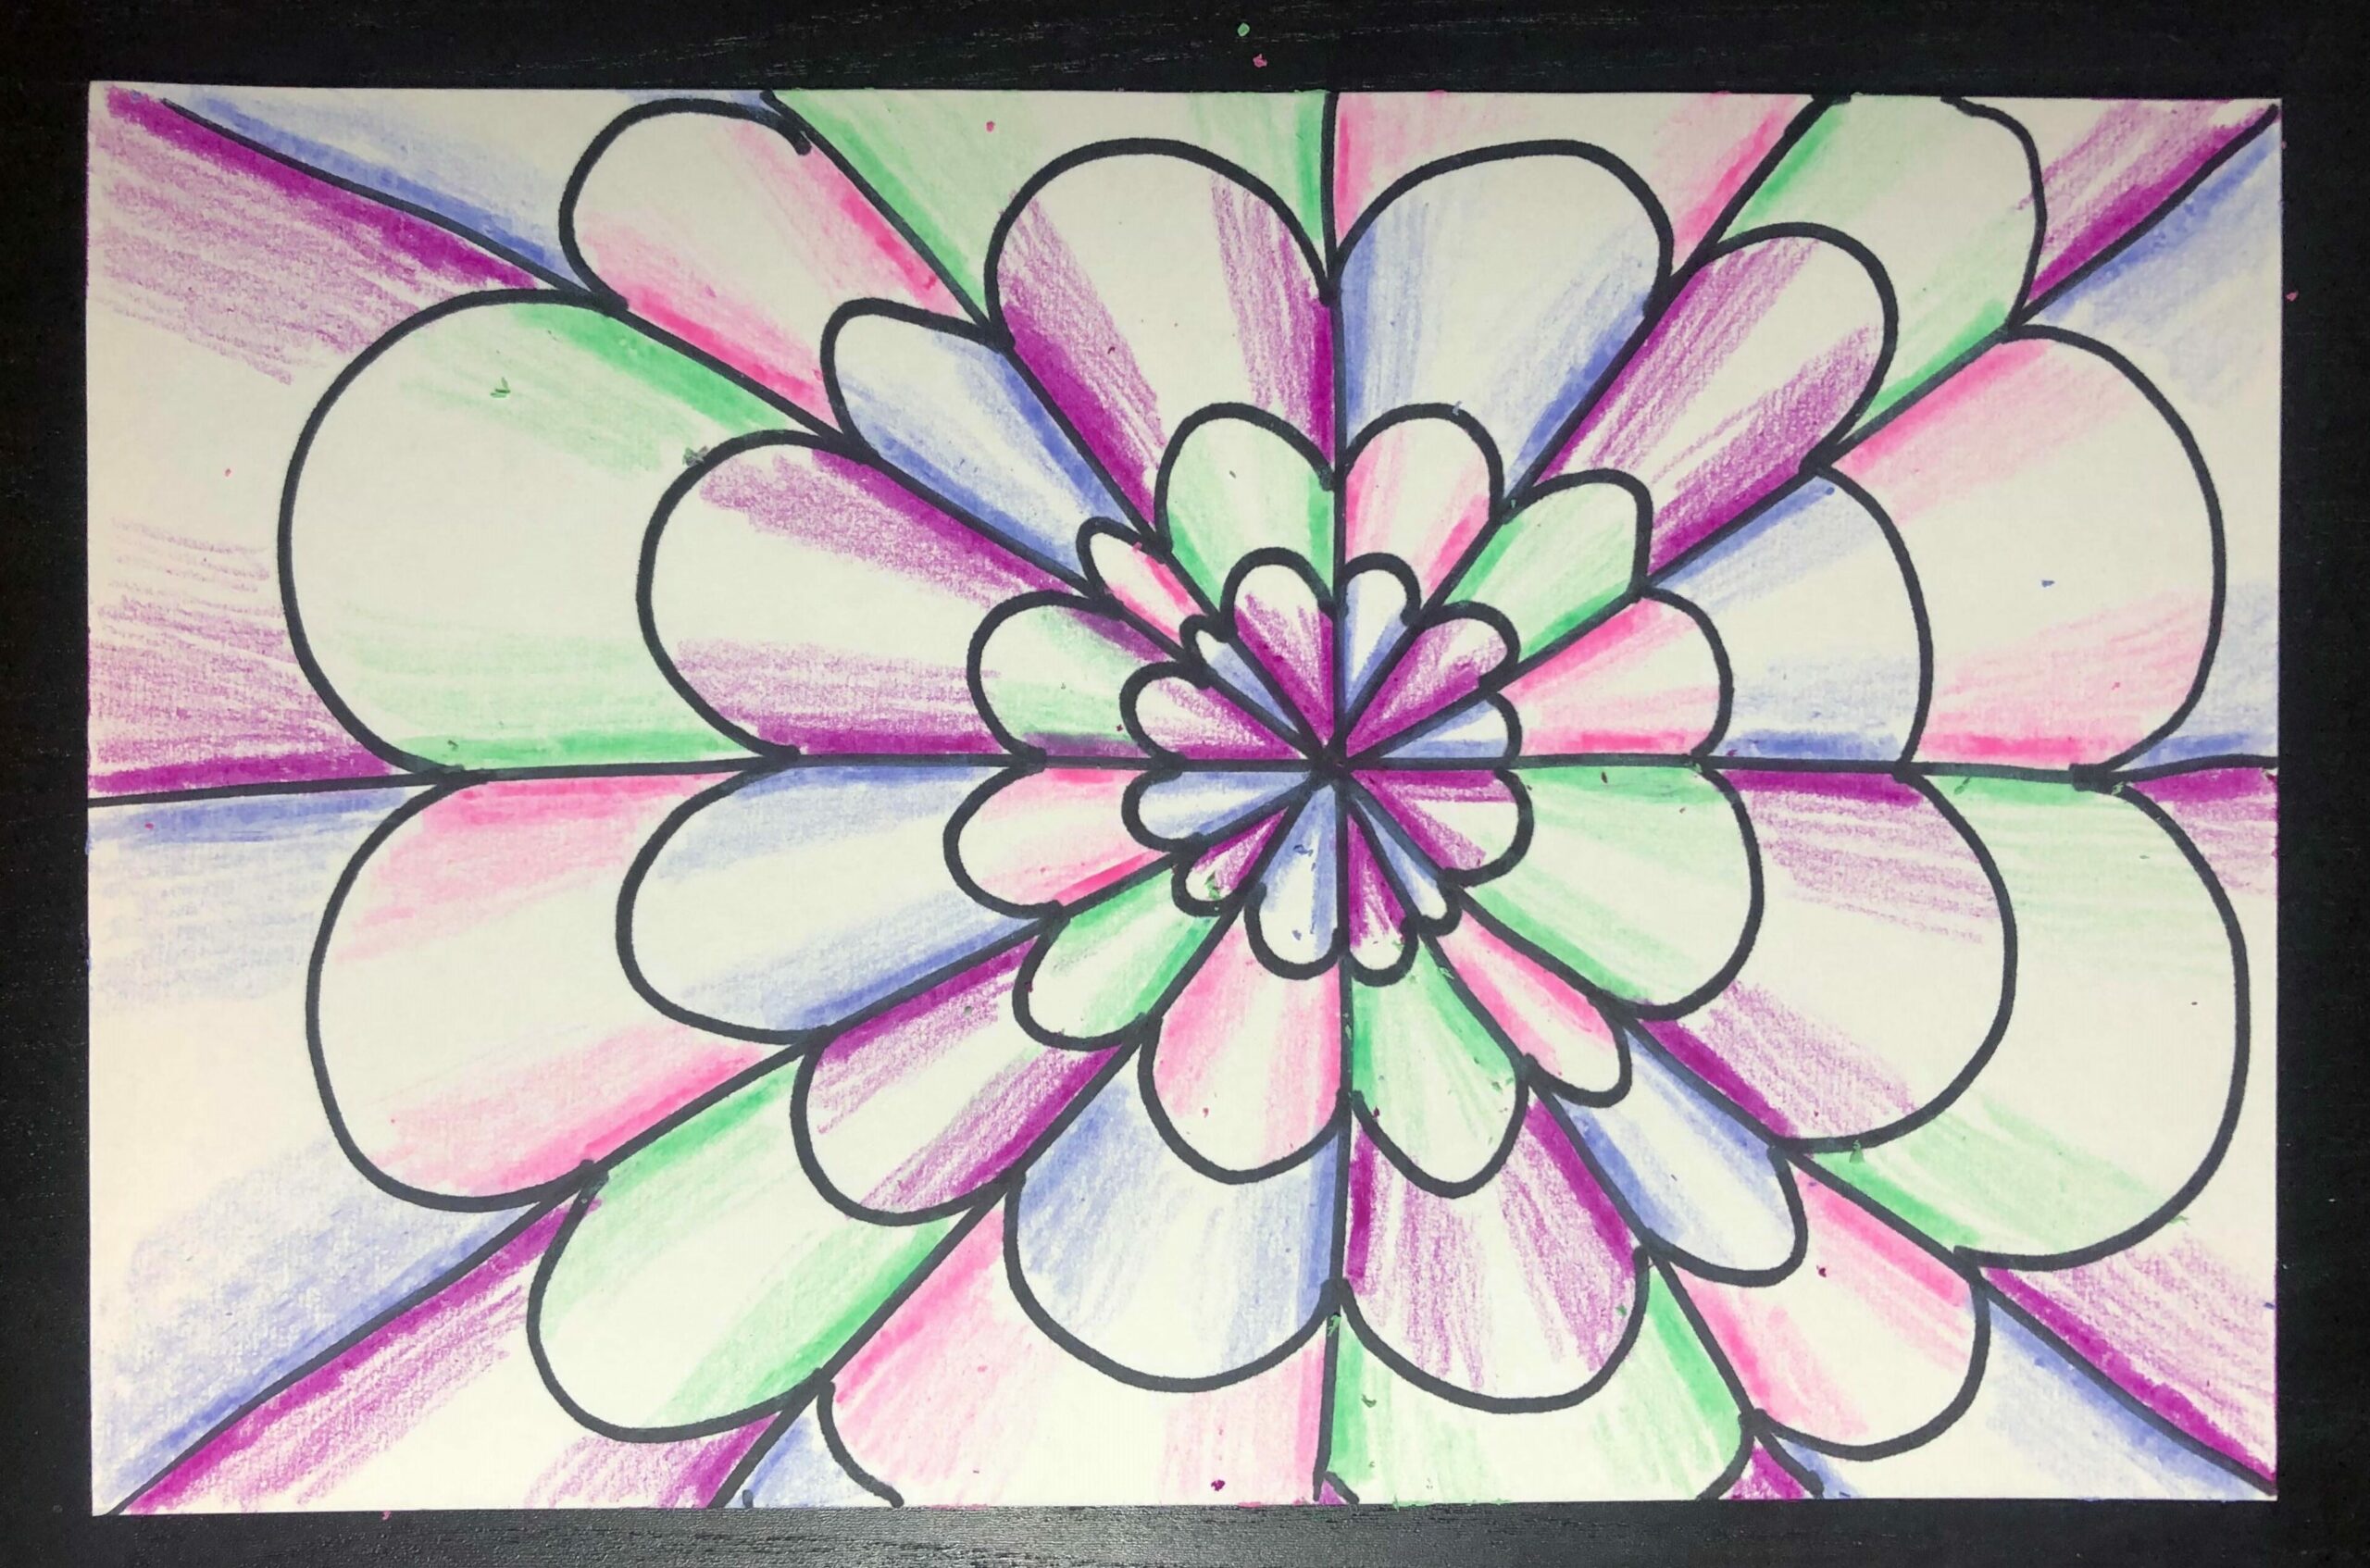
Afterwards, I began colouring. The colouring in this activity was a lot less challenging than I anticiapted. Looking at the drawing, it looks more complicated since there is a lot of shading. However, once I watched the video I noticed that all I needed to do was press hard on the crayon on the outside (near the lines), and softer towards the centre. The centre of each segment was left completely white, so that it looks more highlighted and 3-D.

The final project!

Pros:

  • The colours and the shapes could be elaborated on in an art unit. Since there is both organic shapes and they are all coloured, students could pick a colour group and stick to those colours.
  • Helps teach shading in a simple way. The shading was not hard to do in this activity since all I had to do was press hard in the edges and use a lighter touch towards the centre.

Cons:

  • When you press hard on the crayons you risk breaking them. I broke the purple crayon while completing this activity; although it is not as bad as the scratch art.

I would definitely use this activity in a future classroom. There are practically no cons to doing this and the end result is great! It is really simple but looks complicated which I think the students will like. As I mentioned before, this activity could be used to cover colour or shape; however, it can also be used cross-curricularly in math by incorporating a lesson on patterns before starting.

« Older posts Newer posts »